Portal Security and Privacy Settings
The Vensa Portal offers several levels of security to protect your data and privacy
This guide will talk you through how to set up the security features on your Portal.
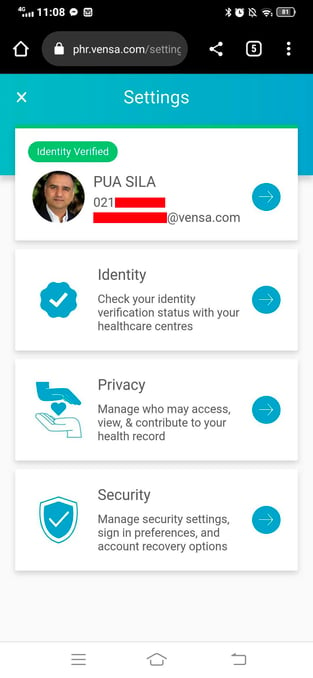
Log in to your Portal account and press the menu (three bars at the top left of the screen). Head to your "Settings" section and you'll see the screen below. "Identity" will show a list of practices that have fully verified your identity (more on that in the "Identity Verification" walkthrough).


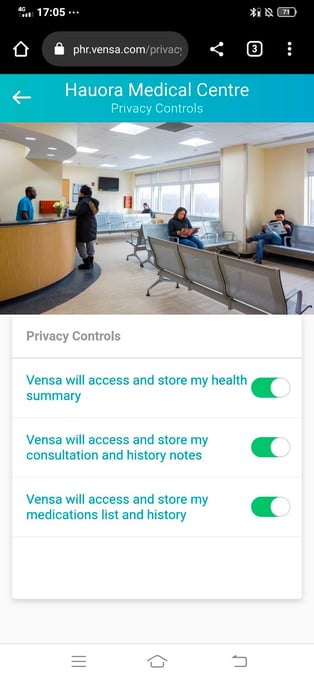
Privacy takes you to a brief but really important section (picture above, on the right).
You will need to decide what your Portal will do with your medical data. You can choose to access all of your medical data (or limit access) on your Vensa Portal, using the toggles on the right.
❕ If you toggle off (red) all of the above, you will not be able to see any of your medical data on your Vensa account.
"Health Summary" gives a timeline overview of your health journey. Listed here will be brief details of previous appointments, tests, prescriptions etc. Allow this feature to access your Health Summary through your Portal.
"Consultation and history notes" are notes written by your doctor/nurse regarding your appointment. Enable this to see notes written by your healthcare provider from your visits. (not available at all practices)
"Medications List" is a handy list of all your normal long term medicines, as well as anything else you have been prescribed in the last 6 to 12 months (timelines vary by practice). This is a great feature if you ever have trouble remembering what medicines you take, especially when visiting new clinics/hospitals etc.
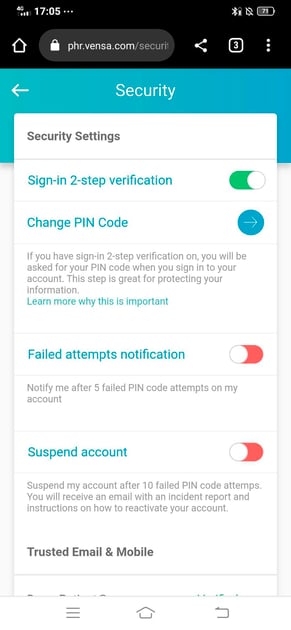
Security shows you the levels of security you can set up for your Portal account. Some people may share their phone or main account with other family or whānau, and therefore may desire more security layers. Below we see the Security settings:


"2 step sign in" uses a PIN as well as your email/password to log in to your Portal. If this is turned on you will need to enter your PIN every time you log in to your account. You can chose either a 4 or 6 digit PIN. If you don't want or need this extra level of security, just switch the toggle off.
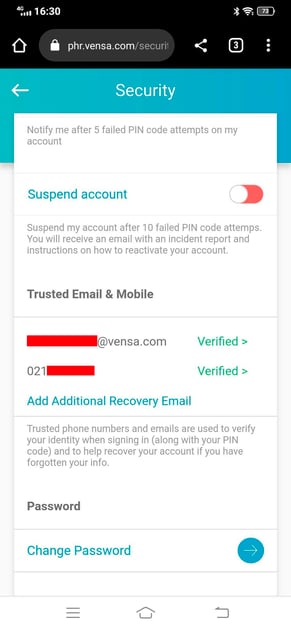
"Failed attempts notification" - turn this feature on if you want to receive a security notification when someone attempts to enter an incorrect PIN 5 times. You can go one further enable the "Suspend Account" option - when a PIN has been entered incorrectly ten times your account will be suspended for your safety.
You will see options below to update mobile numbers, recovery emails, etc. It's a great idea to keep these up to date in case you ever need access to your account.
That's it! Take a few moments to set up your security settings and rest assured all your private data will be kept private.
Looking for our privacy policy? Click here
Still curious? Click on the topics below to learn more
